


CLOAK & DAGGER DIY FACE MASK: STEP-BY-STEP TUTORIAL!
February 03 2021, 0 Comments
It’s 2021, and we’ve decided to make the most out of our time at home! Below we have put together for you a step-by-step guide on how to make the most perfect DIY two-layer cotton masks. Enjoy babes!
Step 1: Brainstorming
Before you start anything, the first thing that you need to do is decide what kind of mask you would like to make. We have made 2 different styles in the shop, the classic square (folded fabric) mask and the new cone style. Today we will be showing you how to make the cone style!
Step 2: Measuring
Your next step is to measure the length you want your mask to be. We decided from the bridge of the nose to the bottom of the chin is the fit we want. As you are deciding your fit, write down your measurements. We have also found that it is easy to replicate the fit of your mask based on one you already like and own. The pattern in this article is the one we found was the best fit for us, but you can change it to fit you better if needed!
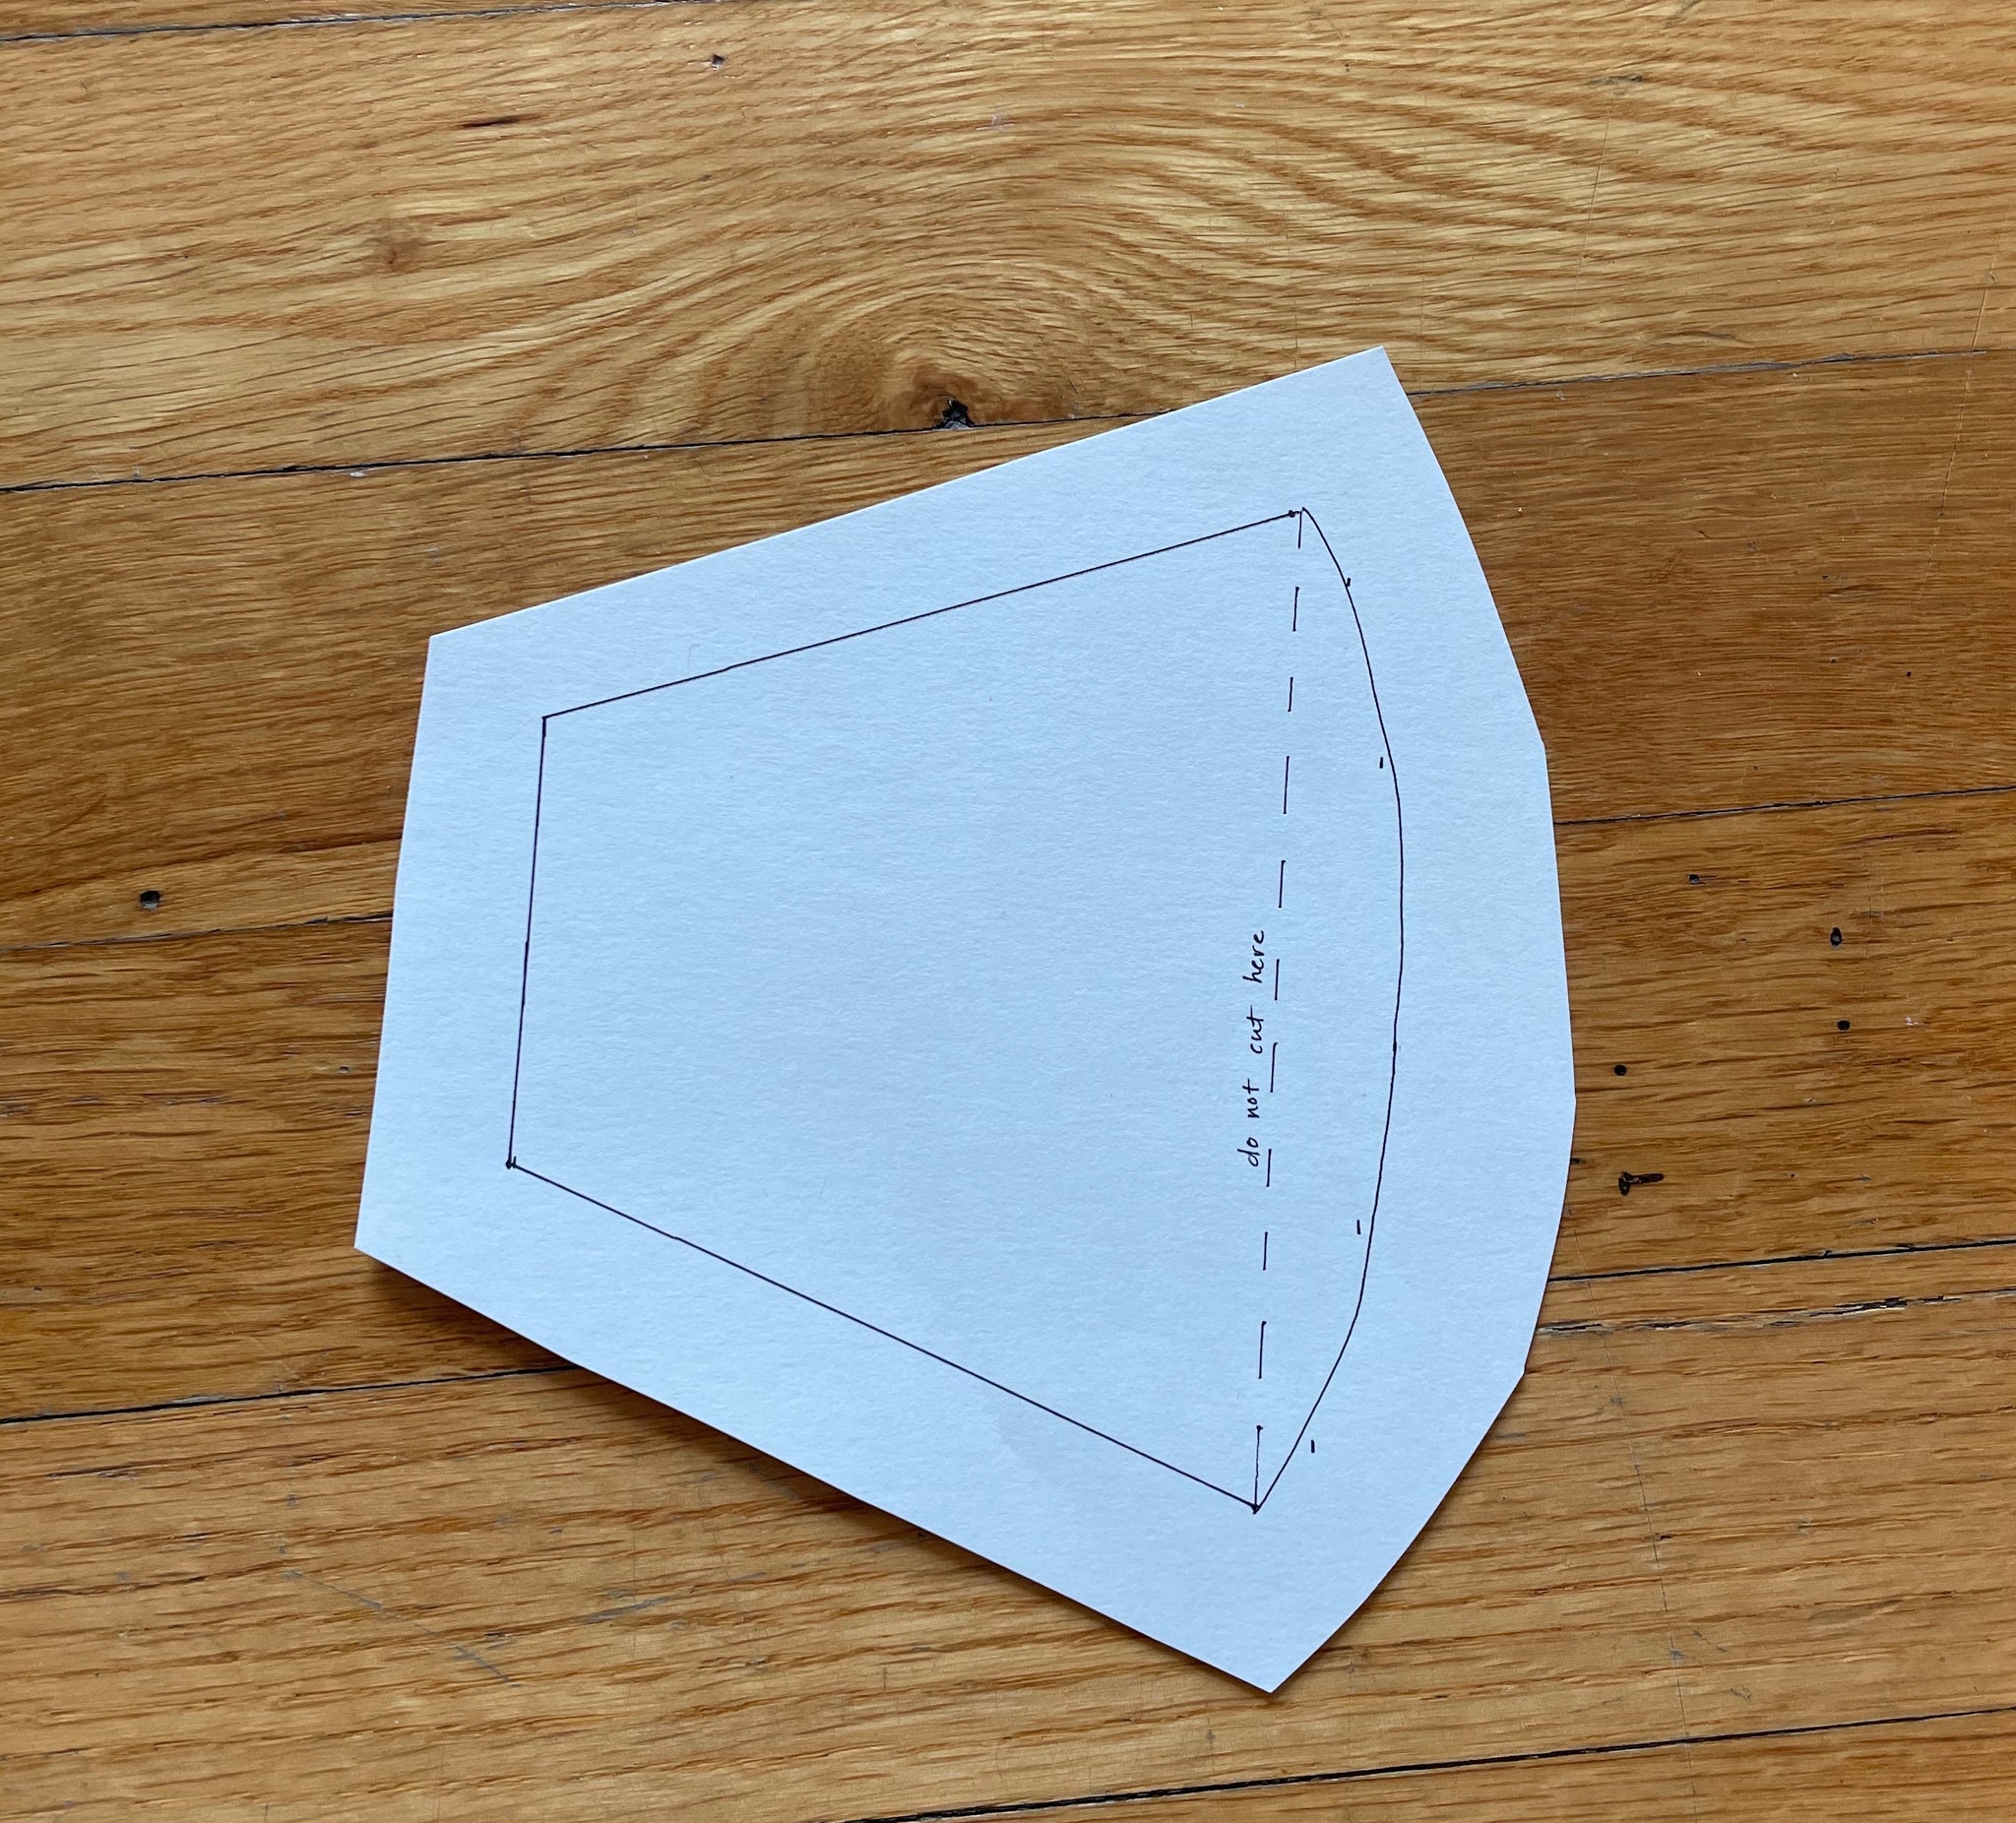
Step 3: Pattern Making
- Grab some sewing pattern paper (or a thicker kind of cardstock), a ruler and a pen.
- Sketch out the pattern on the paper. See the image below for a better idea of how our pattern is shaped.

Step 4: Cutting Your Fabric
- Fold your fabric in half, and press down with an iron (this will cut down on your time, as you have to cut 4 pieces of the pattern total.)
- Pin your pattern down and cut, making sure to leave yourself some seam allowance. We recommend about ½ an inch.


Step 5: Trace Your Pattern
- Carefully un-pin your pattern from the fabric. If your fabric is printed, double check that your fabric has the right sides facing in towards each other.
- Place tracing paper between your fabric and your pattern, and re-pin. Trace along your pattern lines on each side of the fabric. See images below for visual guide.


*Re-do steps 4 & 5 so that you have 2 sets of fabric total (4 individual pieces)*
Step 6: Starting to Sew
- Begin by sewing the curves of your mask. For one mask, this will happen twice (as you have 2 sets of your pattern). *remember to make sure that your fabric is right side in*

- Fit the two sides of your mask together (right sides in) and pin together tightly.

- Sew the 4 inch sides of your mask together. This will be when you finally combine your two separate pieces together. DO NOT SEW THE 2 ¼ INCH ENDS YET.

Step 7: Flip
- Once you have gotten to this step, you should have one piece of fabric, with two 2 ¼ inch holes on each side OPEN.
- Trim the excess fabric off.

- Flip your entire mask inside out through one of the 2 ¼ inch holes on either side. After you flip keep in mind that the right sides of your mask should be outside and seen.
- Press the sewed edges of your mask down with an iron.

Step 8: The Ends
- Check the ends of your mask. Find the tracing line, and fold one side along that line. Press with iron. Fold the other side to match, and press.


- Cut two identical pieces of elastic, we recommend about 7.5 inches for each one.
- Carefully sew onto the corners of your mask, only putting about ¼ of an inch inside the folded fabric (you want there to be enough for the stitch to grab onto, but not too much that you waste elastic).
- Sew to finish.
*Tip: We find it easier to sew in one side of the elastic first, then stopping your machine and carefully tucking in the other side to finish sewing.*

Here is an image of the finished product! We hope you love the masks, and have some fun indoors learning how to pass some time and also be safe when you leave the house!
Please remember, wearing a mask is essential right now. It protects everyone around you and saves many lives. You watch out for your loved ones & neighbors, and they watch out for you! It’s really simple to just wear one, so why not make yourself a SUPER cute one!
XO,
Cloak & Dagger
